Help
Getting Started with mitoYDNA
Before uploading DNA data you need to create an account or log into our site. This document explains how to (We also have help videos on our mitoYDNA Youtube Channel):Create a free account
- If this is your first time on our website you will need to create a free account.
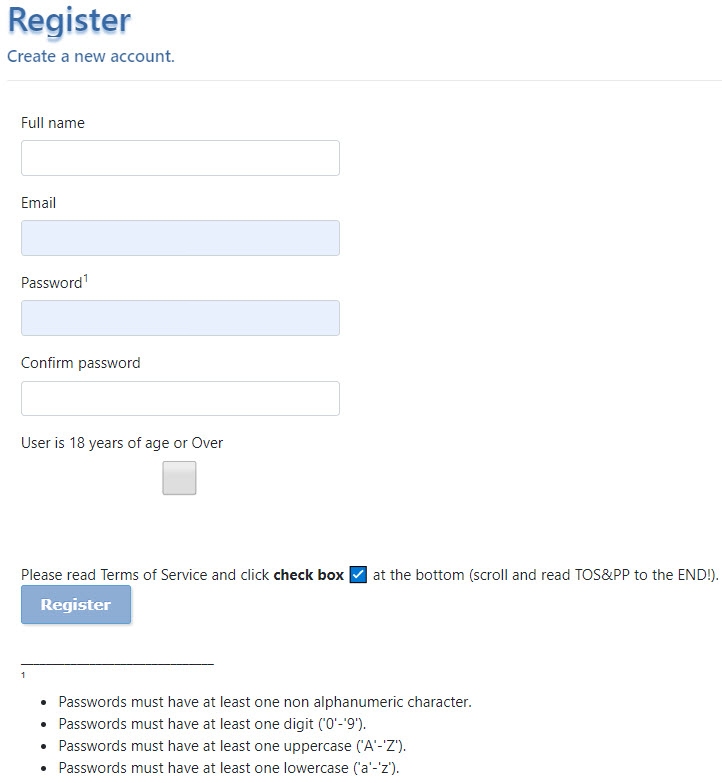
- Click on Register on the right of the top menu. The following screen appears.
- Read through the Terms of Service and Privacy Policy on the right. You must scroll all the way to the bottom. There is a box located there that must be checked.
-
Enter your:
- Full name
- Email address
- Create a password; Passwords requirements are at the bottom of the page
- Click the box indicating you are 18 years of age or Over.
- Make sure you have clicked the check box at the bottom as indicated
- Click the Register button. If this button is not active ("bright"), then you have not answered all the questions. Please review the screen above to ensure all the boxes are filled in.
Log In
If you have created an account- Click Login (top right hand corner of the screen).
- Enter your email and password.
- Click the “Remember me?” box if you don’t want to have to type in your email and password each time you come to the site.
- Click Log in. You are now on the main screen. The menu at the top now has two more options: Kits and Tools.
Download Results
To be able to upload your results to our website, you first need to download your results file from the company you bought the DNA kit from.
- Click FAQ/help to go to the FAQ/Help page.
- In the Introduction to mitoYDNA tab/section is a Company Help File table.
- Click on the company from which you took your DNA test.
- This link will take you to a page with the instruction to download your results for that company.
Upload results
- Go to our website www.mitoYDNA.org.
- Click on Kits. When you click on Kits, the following screen appears.
-
Click on Create New Kit.
The following screen appears:
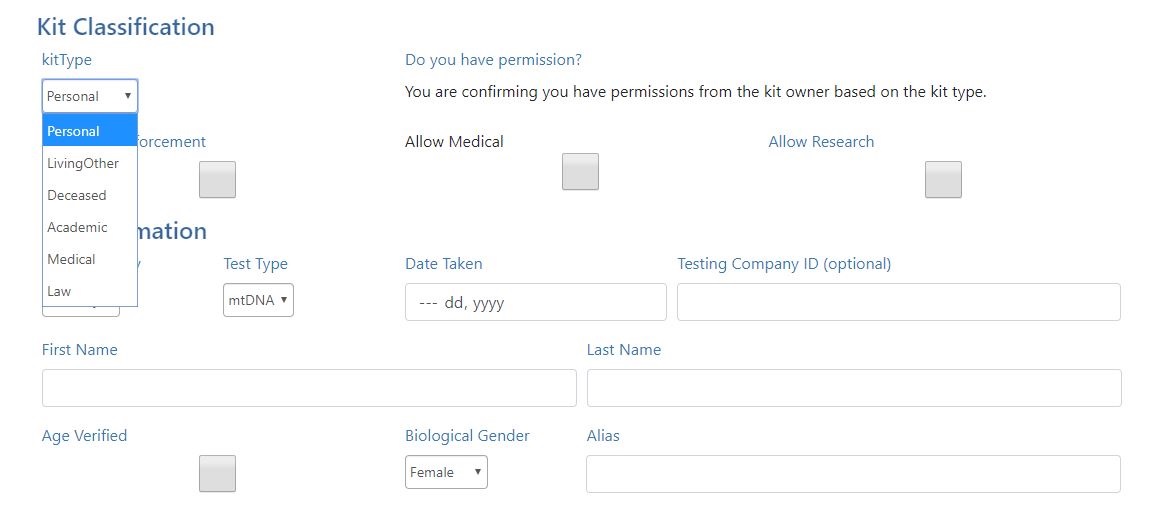 There are four sections to this page.
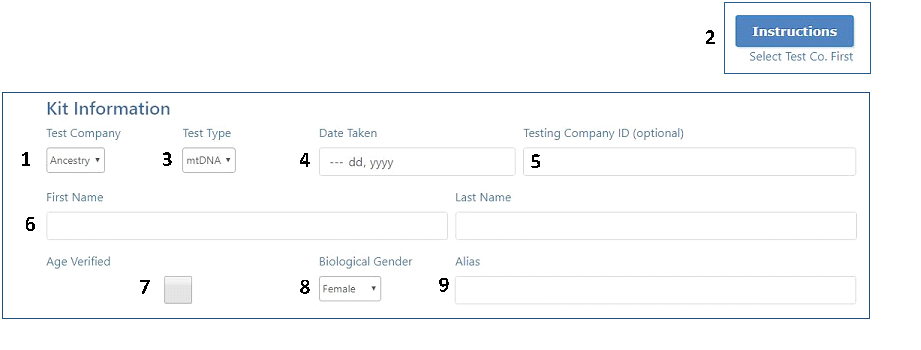
- Click on the drop down box for kitType as shown above.
- Select the status of the Kit being entered.
- Click the box for the permission/security you wish for this kit as it pertains to:
- Select the DNA Company for this kit that you have downloaded.
- If you do not know how to download the data from that company, click the Instructions button in the top right. This will take you to another page with the instructions to download.
- Once the kit is downloaded, select the drop down box for Test Type to select the type of DNA test. mtDNA or Y-DNA
- Type in the date the DNA test was Date Taken.
- Type in the Company's test ID (optional).
- Type in your First Name and Last Name in the labeled boxes.
- Click in the Age Verified box to indicate that you are 18 years of age or older.
- Click on the Drop Down box to select Biological Gender.
- In the Alias box, optionally type in the name you would like to be identified as on this site.
- WikiTree - Allows an interface to your information on WikiTree
- GEDmatch - Allows you to do a 1:Many Match of your Autosomal kit on GEDmatch
- Look on your pedigree chart. Follow your patrilineal line to see the name of your earliest male ancestor you have on the chart. Patrilineal line is your Father to his Father to their Father back as far as you have researched. You will use that person to answer as many of the following questions as you can. Leave blank what you do not know.
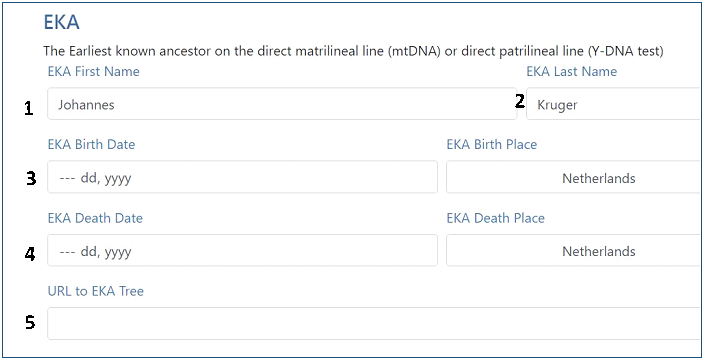
- Type in your Earliest Known Ancestor’s First Name. Type in the Last Name of this person.
- Type in this persons Birth Date and Birth Place. You can use the drop-down date picker to help with the dates.
- Type in this person Death Date and Death Place.
- If your Tree is online, type in the URL to EKA Tree for your tree. URL is the web address to the website. You can copy the URL. Open your tree in a web browser.
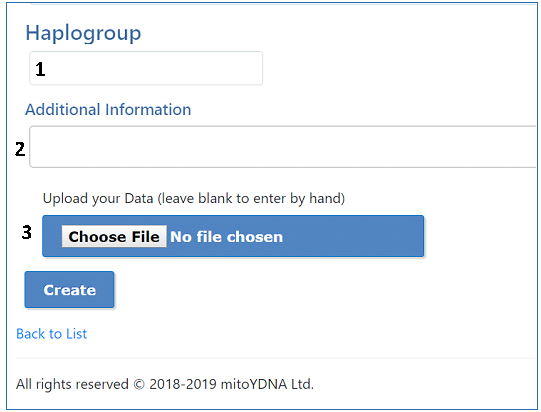
- Enter the Haplogroup. Your Haplogroup is listed on your testing company information about your test.
- Type in any Additional Information for notes about this kit
- Click Choose File. Find your file on your hard drive.
- Click on Open.
- The file name chosen is now listed in the blue button.
-
Click on Create.
The following screen appears listing the kit you just uploaded.
If you upload more kits, they will all appear here.
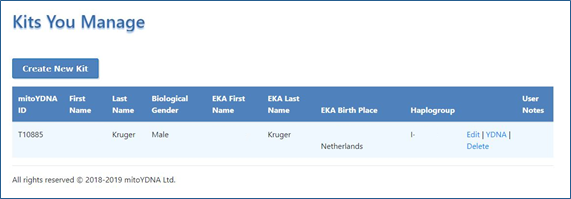
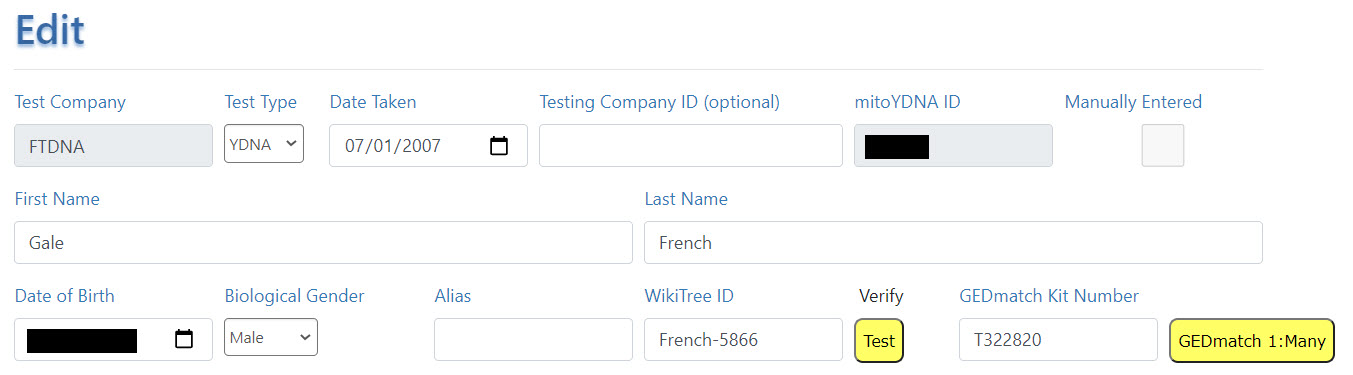
Note: the first name, EKA first name and birth place and Haplogroup information have beeen hidden for privacy of this example.
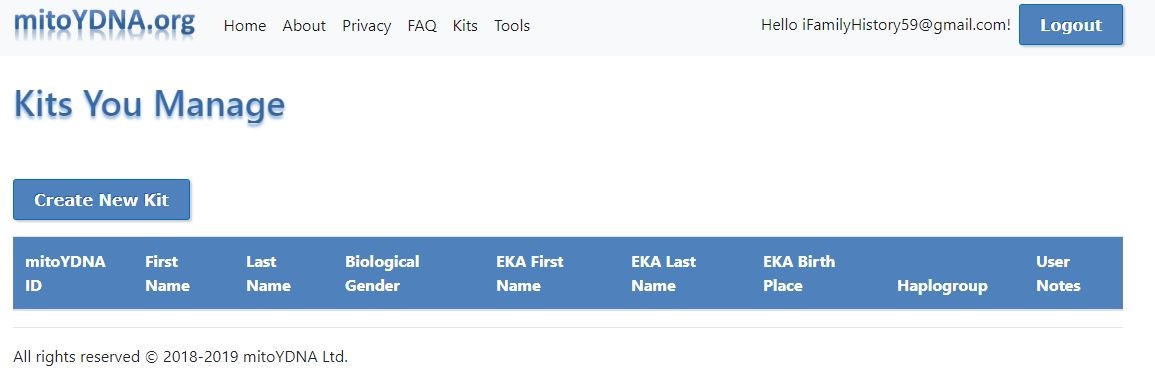
No kits have been uploaded for this user.
Kit Classification
Fill in the information requested in the Kit Classification section:Kit Information
Fill in the information requested in the Kit Information section by following the numbers shown below.
External Interfaces
You can (optionally) enter IDs which link to external resources that help you manage or discover information for your DNA tests.
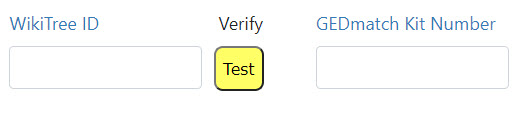
WikiTree
The best way to get your WikiTree ID is to be logged in to WikiTree and use the ID icon at the top of your profile. Click on the "scissors" ID icon which copies the ID to the clipboard. Then paste that ID into the mitoYDNA field for WikiTree ID.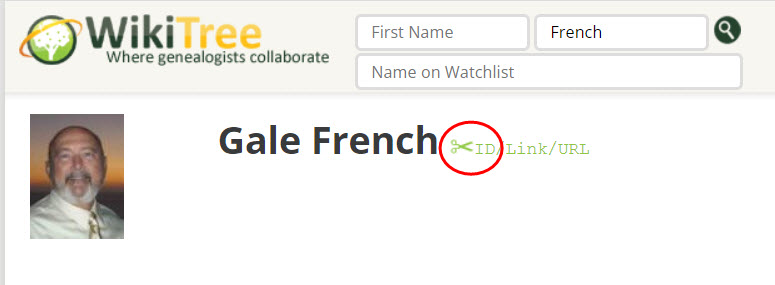 In order to verify that the ID was entered/pasted correctly, click the TEST button next to the ID field.
If the page launced by the test looks like the image on the left below, then it's good.
If it looks like the image on the right below, then it's not a valid ID. Try again.
In order to verify that the ID was entered/pasted correctly, click the TEST button next to the ID field.
If the page launced by the test looks like the image on the left below, then it's good.
If it looks like the image on the right below, then it's not a valid ID. Try again.
| Test is Good | Test is Bad |

|
|
GEDmatch
Login to GEDmatch and copy the ID number of your Autosomal kit on GEDmatch. Then paste that ID into the mitoYDNA field for GEDmatch Kit Number. On the EDIT screen, you can run a 1:Many Match of your kit on GEDmatch. It's best to already be logged in to GEDmatch before you run this test.EKA (Earliest Known Ancestor) section
Fill in the EKA section as illustrated below
Haplogroup section
Enter your Haplogroup. Haplogroup is reported by your test company. Use the format 'X-zzz' where X is your major Haplogroup and zzz is your subclade or terminal SNP (e.g., 'R-M512' or 'R-BY31431'). Haplogroups classify people into DNA groups. This data is for information ONLY and is not used in comparisons.
View the Results
-
Click on YDNA (or mtDNA - depending on the type of kit) on the right hand side of the kit listed, to view the details of the kit.
The following example (for a Y-DNA kit) shows the first/last name, Haplogroup, mitoYDNA ID and number of STR markers on the header.
Next are listed the allele values for each marker tested.
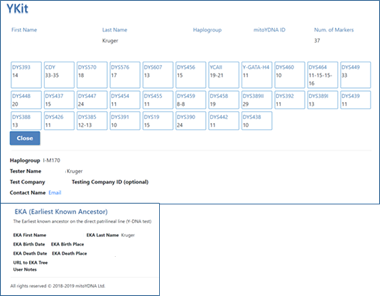
- When you are done reading, click the Close button to return to previous screen.